Professional Preparation Tips from Your Trusted Painters in Philadelphia
Preparing your walls before painting is the key to a successful paint job. Taking the time to make simple preparations in advance can help the painting process go smoothly. Preparing walls for painting may not be the most glamorous job but the more you do it, the easier and faster it becomes. Plus, you’ll be left with a clean base to produce that perfect paint job. While not every surface will need to undergo multi-step preparation, it’s important to double check your surfaces before painting and take action where required.
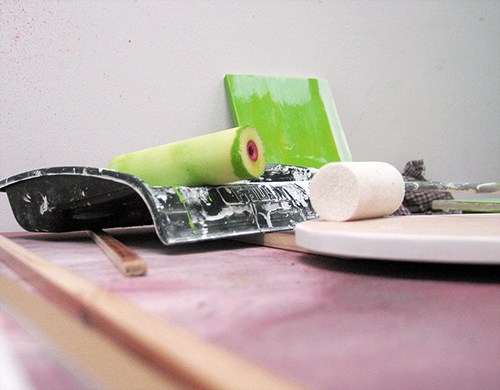
Top Tips for Preparing Your Walls for Painting
There is no other DIY advice that gets ignored quite like the recommendation to thoroughly prep your walls before painting. However, to ensure you are happy with the end result, preparing your walls for painting is a very important place to start.
Here are some of the main steps you need to take before applying paint to your walls:
- Clear the Space: Before directing your attention to the walls that need re-painting, it is important to gather all your materials and clear the space. This includes removing any furniture from the room or moving it to the center and covering it with plastic sheets that are securely fastened to the bottom of these items. Doing so will help protect your furniture from paint splatter and also from all the dust when you start to prepare your walls for paint.
- Unscrew Switch Plates and Outlet Covers: Using a screwdriver, remove all the switch plates and outlet covers from your walls. To avoid misplacing the small plates and screws, place them in a plastic baggy for safe keeping. Next, use painter’s tape to cover and protect exposed outlets.
- Repair Wall Damages: Patch up any holes, scratches or other imperfections with a spackling paste. For small repair jobs, you can use your finger to rub spackle into the hole to fill it in and create a smooth, even surface. For more noticeable repair jobs, dip the end of your putty knife into your spackle and spread a thin layer over the hole. Spackle should be left to dry for at least one day before moving onto the next step.
- Sand the Surface: If you have rough spots on your walls, these areas must be sanded to make sure the paint goes on smoothly. Using sandpaper or a sanding block, buff out any uneven surfaces. This will help your primer and paint grip onto the wall much better. When sanding, remember to wear a mask so you don’t breathe in any of the dust.
- Wash Your Walls: Make a cleaning solution with warm water and mild dish soap. Dip a sponge into the solution and wring out the excess water. Using small, circular motions, clean your walls with the damp sponge and rinse it off occasionally so you don’t accidentally spread around dirt and dust. Let your walls dry completely before painting.
If you live in Philadelphia and need custom interior painting and refinishing solutions, Mastercraft Painting & Finishes is here to help. If you are looking to give your home a much-needed refresh in time to welcome back family and friends when it is safe to do so, working with our professional painters can help you reach your interior decorating goals safely, efficiently and on budget. Our fully licensed, bonded and insured team of contractors have extensive experience in working on homes of all sizes and styles, in addition to giving personalized attention to each and every project. Our residential services also include exterior painting and refinishing services to keep your home looking as beautiful on the outside as it looks on the inside.
If you want to have your home or office painted, count on our team of professional painters. From planning and preparation to painting, we are there with you every step of the way. Contact Mastercraft Painting & Finishes online or call 267-496-5307 for a free estimate.